Continuing from the previous post, open up the “Paycheck” account. Under the View toolbar option, ensure you have Auto-Split Ledger selected so we can see the details for each split.
Enter a new transaction with today’s date. Call it “Example Transaction”. On the first line, you will notice the Account is “Income: Paycheck”. Enter “100.00” in the Income column on this line. Tab over. For the next split select “Expenses: Discretionary” and allow gnucash to auto-fill the Charge column with “100.00”.
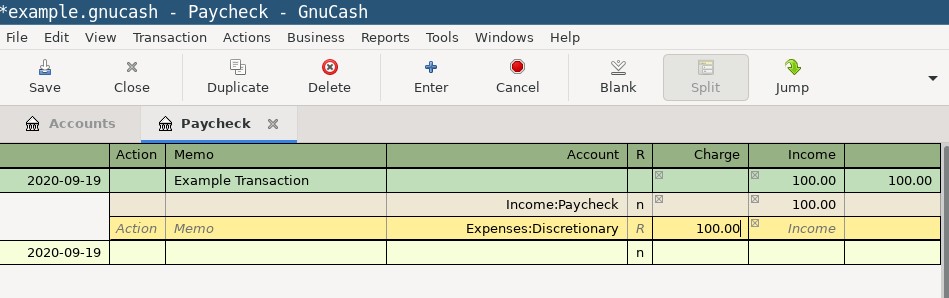
You have entered your first transaction. This transaction shows that you have taken $100.00 from the Income:Paycheck account and moved it to the Expenses:Discretionary account.
Close this account and open up the Expenses:Discretionary account. Notice that your transaction shows up here. Also notice that the column names changed from “Tot Charge” to “Tot Expense” and “Tot Income” to “Tot Rebate”. Each account type (Income, Expense, etc) has their own column heading names for a more intuitive description of the action being taken. That said, each column always represents the same thing - the first column is an increase to the account, and the second column is a decrease. In the context of Income, the action of receiving income is the same as registering a transaction in the “Tot Income” column. In the context of Expense, the action of increasing your expenses is the same as registering a transaction in the “Tot Expense” column.